This increasingly popular flowering plant does well in hanging pots and butterfly gardens. Here's everything you need to know about helping yours thrive.
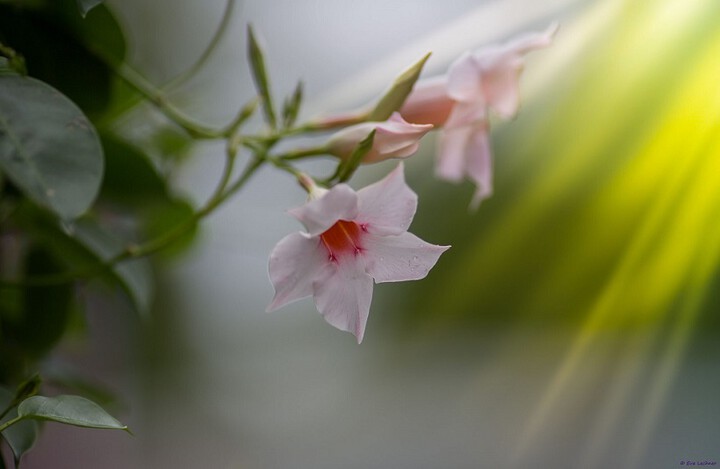
The perfect flowering plant meets all of these requirements: not too big (or small!), has plentiful flowers, is easy to transplant, works in both pots or in the ground, and is long lasting. Now isn't that every gardeners dream? Good news—dipladenia not only meets all these qualifications, but its recent spike in popularity has led to many new colors and varieties. It's affordable, readily available in nurseries around the country, and easy to care for, even for those without a green thumb.
Horticulturist and gardening expert Melinda Myers has been growing this beauty for 30 years and refers to the plant with its trumpet-shaped flowers as one of her favorites. Here, she shares everything you need to know about including this low maintenance bloom in your garden.
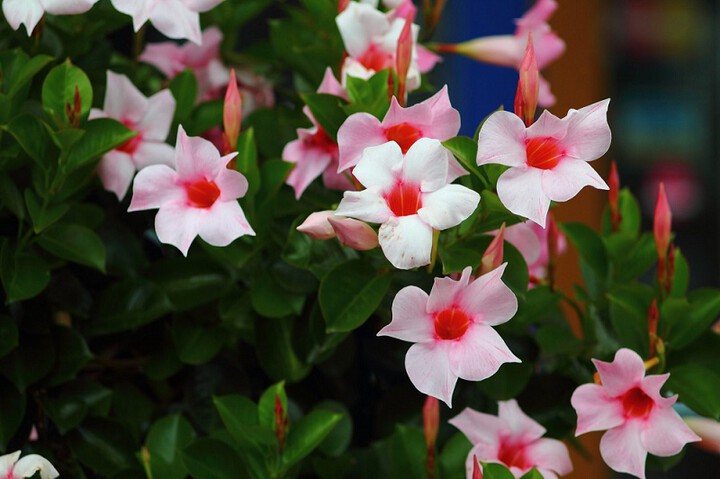
It's best to grow dipladenia in a container.
Dipladenia thrives in containers, as a hanging plant, or in the ground, but Myers suggests planting them in containers and then training them on a trellis, allowing the flowers to really become the focal point. "They can be the trailer, thriller, or filler," she explains, adding that they're commonly mixed in containers with other sun-loving plants. These flowers are also perfect for attracting pollinators, especially butterflies and hummingbirds.
Dipladenia aren't fans of cold weather.
These plants are native to the tropics, and are considered hardy in zones 10 to 11. Because they don't tolerate temperatures below 45 degrees, Myers suggests either growing them annually or moving them to a sunny spot indoors come the winter (another good reason to plant them in pots!).
As for pruning? Dipladenia doesn't need it.
In line with their low maintenance reputation, dipladenia shouldn't need much (if any) pruning. Myers says these plants don't require deadheading either, as the blooms fade and drop on their own. However, if the plant is trained on a trellis, some pruning may be necessary for the best-possible growth.
Check for patents before you propagate.
When propagating dipladenia, it's important to first check the label to make sure your particular variety isn't patented. "It's illegal to propagate patented varieties," Myers explains. "This restriction allows breeders to recoup some of their money spent developing new varieties, and helps gardeners in that breeders can continue to introduce new plants that perform better in our gardens." If you were hoping to propagate a patented iteration, it might instead be worth a visit to your local nursery to see if any new varieties have recently been added to their offerings.
Choose your propagation method.
When propagating non-patented dipladenia plants, Myers says that you have two options: The first is to take a four- to six-inch-cutting from the green, pliable tip of the plant (avoid the older, wood-like section of the stem). Dip this in rooting hormone, and stick it in moist, well-draining potting mix or vermiculite.
The other option is to propagate with a layering technique, which allows the new plant to be fed all its nutrients by the parent plant while it starts out. For this technique, leave the stem attached to the parent plant, but use a knife to cut halfway into it, creating a notch about nine inches below the tip (you don't want to fully cut the stem, so you should wound it, or twist it until it cracks). Treat the cut area with rooting hormone, and bury the notched area in the same soil or in another pot just beside the original. To keep the notched and buried stem in place, you can sit a stone right on top of the soil. Once the new plant is rooted, disconnect it from the parent plant—and voila! You have a new dipladenia.
Protect your skin when handling dipladenia.
You'll want to use gloves when handling and propagating dipladenia, as its stems contain a milky white sap that may cause skin irritation. Though it is considered a nontoxic plant, it's probably best kept away from pets and small children who may show interest in eating it.
Transplant with care.
Dipladenia can stay in the same pot for a long time. "These are very resilient plants," explains Myers. "You may not need to transplant them, as they're tolerant of being somewhat pot-bound." Annual transplanting, however, might help keep your dipladenia looking its best. In this case, Myers recommends choosing a planter size just two inches larger in diameter. A pot that's too big will allow the soil to hold water longer, which can lead to root rot, she says. This kind of move can also temporarily stall blooming.
If you've purchased a small plant that's on a trellis and want to move it to a larger container, Myers says it's best to minimize the disturbance at the root collar (where the stem joins the roots). She typically gives the plant a good watering in the morning before transplanting later in the day, then another water once the plant's been successfully moved. Tease apart any encircling roots to encourage them to expand into the surrounding soil in the larger container, she advises.
Fertilize dipladenia just once per year.
Many of the potted dipladenia plants sold in stores have some fertilizer in the soil already, so you may not need to add more right away. Myers says to check the label for more information; if yours does include slow-release fertilizer, hold off on feeding the plant for another month or so. "I find that using a slow-release fertilizer like Milorganite once a year in the springtime is all I need," says Meyers. But take caution: Too much nitrogen may interfere with flowering, so don't overdo it.