Have you ever seen a stunning bunch of tulips sitting in a jar of water without any soil and wondered how on earth they can survive?
A beautiful way to display these stunning flowers, it’s actually easier than you might think to achieve.
Making tulips grow from their bulbs in just water can actually be pretty simple to execute if you know how – so listen up!
Why choose tulips?
To begin with, why should you use tulips to create this ultimate look in your home? Well, to be honest, it’s because they are absolutely beautiful.
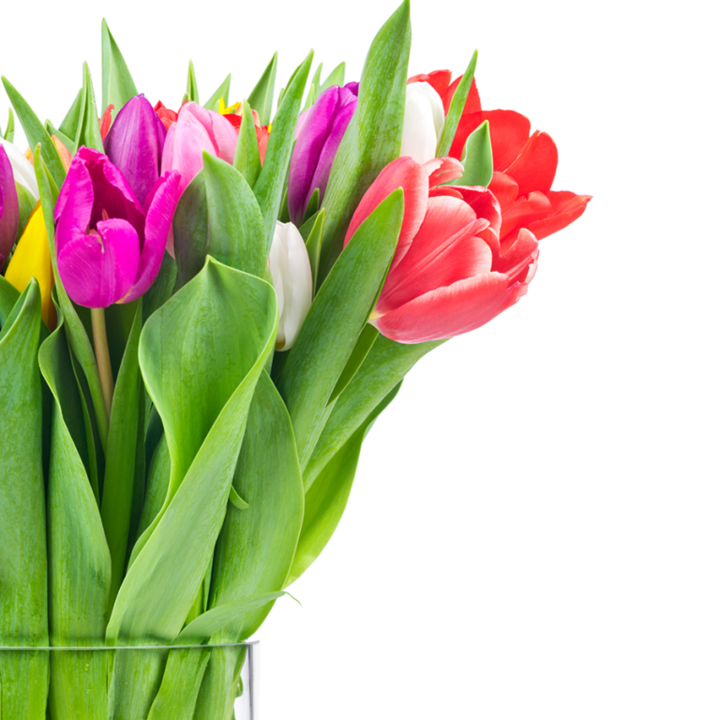
These springtime blooms are colorful, classy and wonderful to look at.
With the tulip being a common addition in Persian art and poetry due to its beauty and grace, they are often thought of as the perfect addition to any home environment, guaranteed to uplift the mood and ambiance.
A cheerful display of blooming tulips can revive any gardener’s spirits during the cold, wet winter months.
So, by planning and preparing your tulip bulbs you can be sure they will begin to make an appearance indoors long before they begin to bloom in your garden.
The process is pretty simple and requires a minimal amount of supplies, meaning the entire family can get involved in growing tulips in your glass jar.
This will guarantee that you will get a touch of spring in your home, before it even reaches your garden.
How to Grow Tulips in a Glass Jar
What you need
In order to create the ultimate “soil-less” tulip, all you need is:
1.A jar – any jar of your choice, or a small vase if that is all you have handy
2.A variety of small rocks/pebbles/ marbles for decoration
3.A tulip bulb
4.Water
5.Darkness and sunlight
How to create your stunning tulip display
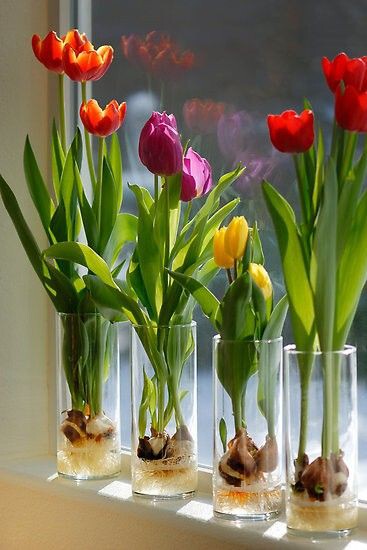
1.To begin with, you should fill your glass container with the marbles, rocks or pebbles of your choice. Ensure your rocks are between 3 to 4 inches in height, so that your tulip has enough room to grow.
Top Tip: Try to arrange these in a stylish way as the color of your pebbles can really show off your tulip and create the ultimate look in your home.
1.Simply place your tulip bulb on top of the rocks, in the center, with the pointed edge facing upwards.
2.Once your bulb is in place, you should try to add a few more rocks around it to act as support to the bulb as it begins to grow.
3.You should then fill the jar with water, with ½ an inch between the water level and the bulb. It is vital that the tulip bulb is not completely submerged in water as it could rot.
Top Tip: While the water should not touch the bulb, it should be close enough so that it will feed the roots as they begin to grow.
1.Next, you should move your jar with the bulb and water to a cool, dark place in your home until it begins to bud.
2.You should notice the roots begin to show in six to eight weeks with the bulb beginning to flower in 12 to 16 weeks.
3.Ensure you maintain the level of the water throughout the weeks. However, if your jar becomes full of algae, you should completely change the water.
4.Once your tulip begins to bloom, you should move the whole jar into a room with sunlight. During this time you should rotate your tulip jar every two days to ensure the entire bulb is getting enough sunlight
It is important to note that tulips that grow inside do not live as long as they do when they are in the soil in the garden so there’s no need to panic if you notice it wilting sooner than you thought. When your bulb does begin to wilt, you should discard it and begin again with a fresh new bulb.
It is also important to know that you should keep the tulip out of direct sunlight as this can cause its blooms and leaves to die quickly. By ensuring they are in a well sunlit area without direct sunlight, you can be sure your blooms will last the distance.
Placing your jar and tulip on a fireplace or a window sill can really bring your home to life and give your home that touch of spring it has been craving during the winter months.
So, get involved this spring and create your own tulip with just the use of a simple jar, stones and water to create the ultimate springtime haven in your living space.